Recall from the last post our 3-phase process for fabricating an aerospace-quality, carbon fiber aeroshell to serve as the "skin" of the HAPP:
Last time we wound up with a nice, smooth, and shiny plug, finished off with a glassy epoxy coating. In this post I'll take you through creation of the mold. I found the instructional videos and reading material at Fibre Glast, Rock West Composites, and Easy Composites to be especially useful.
And quick props to the guys at Fibre Glast - I purchased most of the materials for the final mold and parts from them after trying other suppliers for various prototypes. Fibre Glast has super fast turnaround and their products are great. Thanks guys!
We'll create the mold in two halves so we can open it up to extract the plug, and later, the parts.
The first step is to add some temporary barrier features around the plug using white plastic corrugated signboard. One barrier goes across the plug diameter on the outer surface. This will allow forming of a fiberglass lip to mate with the other half of the mold. Another barrier goes around the plug and sits flush on the mounting board. This will allow forming of a fiberglass flange that will be quite useful once we start forming actual parts. (Spoiler: The flange is for attaching a vacuum bag with tacky tape. Don't worry, we'll get to that later.)
Here's the plug with barriers affixed using pink styrofoam and hot glue.
The second step is to prepare the plug surface. Why, you ask, do we need to do any more than the tedious repetitions of coating, filling, and sanding that we performed already? Because the resin we'll use to make the mold will bond with the plug's grey gel coat unless we first slather it with appropriate release agents.
Here we'll use 4 coats of mold release wax with an hour of drying time between the second and third coats. Then we'll spray it with a thick layer of polyvinyl alcohol (PVA) release agent and let it dry for a few hours. PVA is a water-soluble (but not resin-soluble!) chemical that dries to form a thin green film between the plug and mold. This film can be easily peeled off when we're done. Here's the plug with PVA sprayed on one side, just prior to creation of the first half of the mold:
Now it's time to fabricate. First I paint the PVA with orange tooling gel coat, similar to the grey gel primer I used on the plug. The orange gel coat will ensure a smooth surface on the mold face as I build up the structural layers of fiberglass behind it. The orange color also helps to show surface imperfections so the mold can be properly conditioned. Plus it looks kinda cool.
When the orange gel coat starts to cure and get tacky (I used 2% MEKP catalyst) then it's time to start laying up some glass. The first layer is a 2-ounce plain weave glass. This fabric prevents print-through of the heavier layers behind it. The next two layers are 20-ounce tooling fabric. I wet all the layers with isophthalic polyester resin using a paint brush and small roller to work out the air bubbles. After curing, the first half of the mold looked like this.
You may notice I didn't take any particular care to create an aesthetic pattern with the fabric layup - I was only concerned with functionality and strength. You may also notice the base board is inclined about 45 degrees. This is to ensure the wet fiberglass drapes down around the outer edge of the plug using the force of gravity. Otherwise the glass would droop away from what would otherwise be an undercut radius.
At last it's time to remove the mold and see what we've accomplished. Here's the first half of the mold immediately after coming off the plug. I've peeled away the layer of PVA and I'm starting to trim up the edges with a Dremel.
With the first half cleaned up, it goes right back onto the plug, which is now tilted in the other direction to create the second half. We repeat the same process - wax, PVA, orange gel coat, 2-ounce fiberglass, then two layers of 20-ounce fiberglass. Allow an overnight cure.
Now for the finishing touches. After cleaning up the second half of the mold, I assemble the two halves together using some #10 bolts. I also fiberglass on some legs to stabilize the mold as I fabricate parts.
Finally, I fill in the small gap between the mold halves with automotive body filler, and finish the entire surface by sanding with a progression of #120 to #2000 grit paper. As a finishing touch I buffed the surface with automotive rubbing compound.
Whew! Another 50 hours at least. Now to figure out what kind of carbon fiber composites to use... next post!
- Make a scale model of the aeroshell. This is known as a plug.
- Using the plug, make a fiberglass mold that's a negative image of the model.
- Using the mold, form the various layers of carbon fiber and other materials to create the actual part that will fly on the HAPP.
Last time we wound up with a nice, smooth, and shiny plug, finished off with a glassy epoxy coating. In this post I'll take you through creation of the mold. I found the instructional videos and reading material at Fibre Glast, Rock West Composites, and Easy Composites to be especially useful.
And quick props to the guys at Fibre Glast - I purchased most of the materials for the final mold and parts from them after trying other suppliers for various prototypes. Fibre Glast has super fast turnaround and their products are great. Thanks guys!
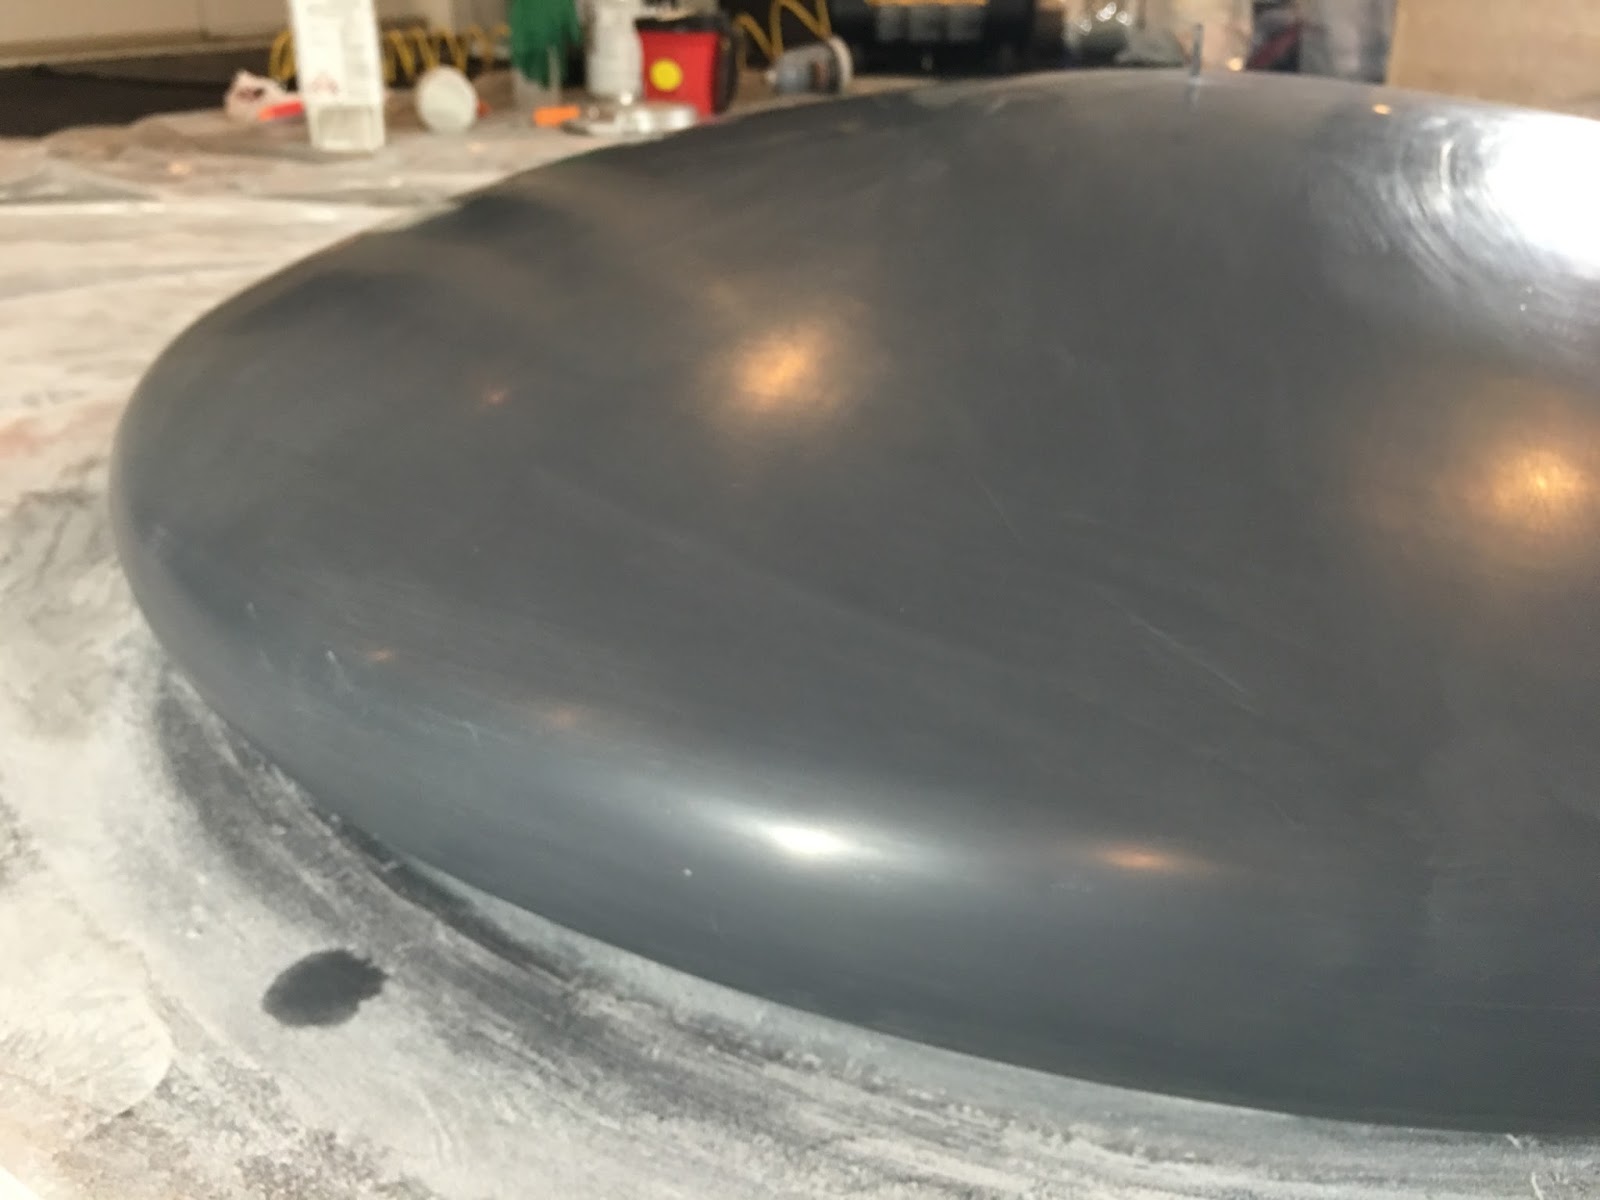 |
| Shiny plug, ready to create the mold |
We'll create the mold in two halves so we can open it up to extract the plug, and later, the parts.
The first step is to add some temporary barrier features around the plug using white plastic corrugated signboard. One barrier goes across the plug diameter on the outer surface. This will allow forming of a fiberglass lip to mate with the other half of the mold. Another barrier goes around the plug and sits flush on the mounting board. This will allow forming of a fiberglass flange that will be quite useful once we start forming actual parts. (Spoiler: The flange is for attaching a vacuum bag with tacky tape. Don't worry, we'll get to that later.)
Here's the plug with barriers affixed using pink styrofoam and hot glue.
 |
| First half of mold to be formed on side opposite from the pink styrofoam |
The second step is to prepare the plug surface. Why, you ask, do we need to do any more than the tedious repetitions of coating, filling, and sanding that we performed already? Because the resin we'll use to make the mold will bond with the plug's grey gel coat unless we first slather it with appropriate release agents.
Here we'll use 4 coats of mold release wax with an hour of drying time between the second and third coats. Then we'll spray it with a thick layer of polyvinyl alcohol (PVA) release agent and let it dry for a few hours. PVA is a water-soluble (but not resin-soluble!) chemical that dries to form a thin green film between the plug and mold. This film can be easily peeled off when we're done. Here's the plug with PVA sprayed on one side, just prior to creation of the first half of the mold:
 |
| Green slime time with PVA. The beige balls of clay are registration dots that will form features to seat with the other half of the mold. |
Now it's time to fabricate. First I paint the PVA with orange tooling gel coat, similar to the grey gel primer I used on the plug. The orange gel coat will ensure a smooth surface on the mold face as I build up the structural layers of fiberglass behind it. The orange color also helps to show surface imperfections so the mold can be properly conditioned. Plus it looks kinda cool.
When the orange gel coat starts to cure and get tacky (I used 2% MEKP catalyst) then it's time to start laying up some glass. The first layer is a 2-ounce plain weave glass. This fabric prevents print-through of the heavier layers behind it. The next two layers are 20-ounce tooling fabric. I wet all the layers with isophthalic polyester resin using a paint brush and small roller to work out the air bubbles. After curing, the first half of the mold looked like this.
 |
| Tilted for a reason.... |
You may notice I didn't take any particular care to create an aesthetic pattern with the fabric layup - I was only concerned with functionality and strength. You may also notice the base board is inclined about 45 degrees. This is to ensure the wet fiberglass drapes down around the outer edge of the plug using the force of gravity. Otherwise the glass would droop away from what would otherwise be an undercut radius.
At last it's time to remove the mold and see what we've accomplished. Here's the first half of the mold immediately after coming off the plug. I've peeled away the layer of PVA and I'm starting to trim up the edges with a Dremel.
 |
| Doesn't look so pretty now but just wait! |
With the first half cleaned up, it goes right back onto the plug, which is now tilted in the other direction to create the second half. We repeat the same process - wax, PVA, orange gel coat, 2-ounce fiberglass, then two layers of 20-ounce fiberglass. Allow an overnight cure.
 |
| Wax/PVA, orange gel coat, fiberglass |
Now for the finishing touches. After cleaning up the second half of the mold, I assemble the two halves together using some #10 bolts. I also fiberglass on some legs to stabilize the mold as I fabricate parts.
 |
| Bolts and legs |
Finally, I fill in the small gap between the mold halves with automotive body filler, and finish the entire surface by sanding with a progression of #120 to #2000 grit paper. As a finishing touch I buffed the surface with automotive rubbing compound.
 |
| The finished mold surface. Ready for parts. The outside is ugly but the A-surface is pristine. It has it where it counts! |
Whew! Another 50 hours at least. Now to figure out what kind of carbon fiber composites to use... next post!
No comments:
Post a Comment